Building a protein membrane system using CHARMM-GUI
GROMACS Tutorial: How to simulate a protein in membrane environment (part1)
Protein membrane systems play a crucial role in various biological processes such as cell signaling, transport, and metabolism. These systems are composed of proteins and lipids that form a dynamic and complex environment. Studying the behavior of protein membrane systems at the atomic level is essential for understanding how these systems function and interact with other molecules.
Performing a Molecular Dynamics (MD) simulation of a protein in a membrane environment can be more challenging than doing a simulation in a simple water solvent. That is also because the generation of the system can be extremely tricky.
For this reason, I will divide this tutorial into two parts.
In this part, I will just show you a quick way to generate a protein-membrane system that you can then proceed to simulate as shown in the second part of the tutorial.
What is CHARMM-GUI?
Generating the system needed to simulate a protein in the membrane can be quite challenging, as there are many aspects that one has to consider. Luckily we have an available online tool that allows us to automatize this boring process.
I am talking about CHARMM-GUI.
An ideal web-based platform to interactively build complex systems and prepare their inputs with well-established and reproducible simulation protocols for state-of-the-art molecular simulations using widely used simulation packages such as CHARMM, NAMD, GROMACS, AMBER, GENESIS, Tinker, LAMMPS, Desmond, and OpenMM.
You can use this software to set up a broad range of molecular systems and proceed to simulate them using your favourite package. In this article, we will just focus on the construction of a protein-membrane complex.
Registration and Input generator
The first step is to register using our academic credentials.
After a few hours, you will receive an email containing the credentials to log in to the platform. Now we are ready for our experiment.
Go on the input generator section (left side) and then select Membrane Builder $\Rightarrow$ Bilayer Builder.
This tool allows you to generate a series of inputs that you can use to simulate a protein-membrane complex. This includes input files that you can use for GROMACS.
Generate inputs with CHARMM-GUI
For the purpose of this tutorial, we are going to consider a small transmembrane peptide (PDB ID: 2MG1). We are going to use CHARMM-GUI to embed this peptide in a lipidic bilayer.
So first of all we need to upload the structure of our protein. We can upload it in various ways.
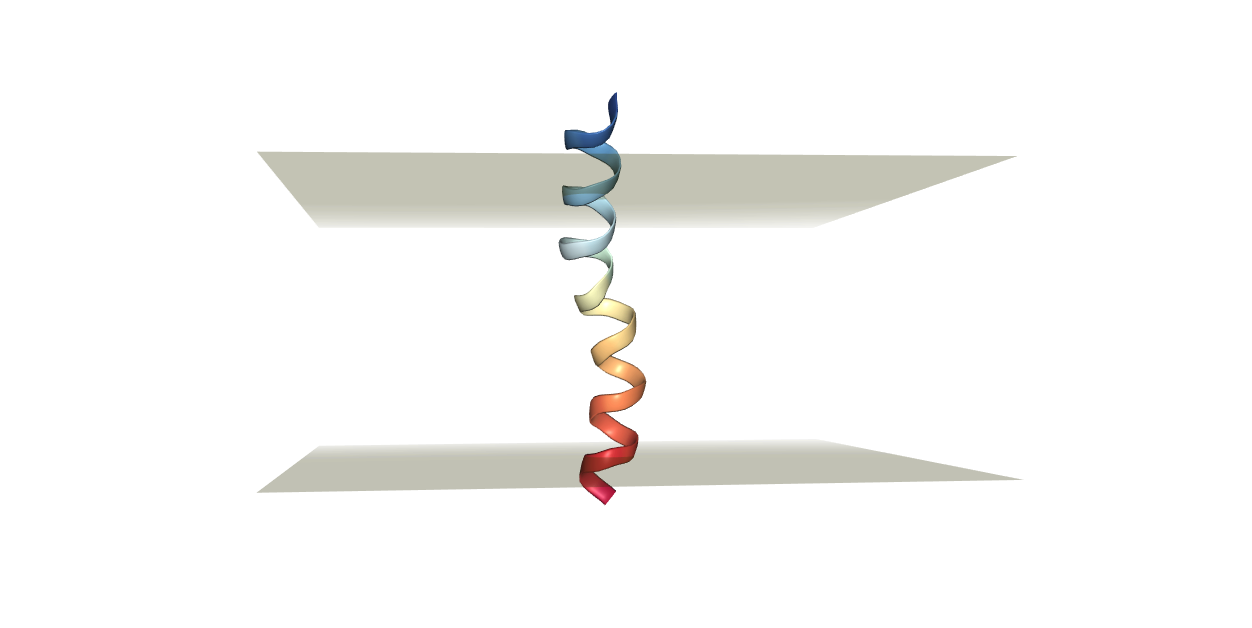
The most convenient method is to download it from OPM so that it has the right orientation with respect to the membrane. We can also upload it from our computer but we need to make sure that the protein is properly oriented along the $z$ axis. This is required to make sure that the protein-membrane complex forms something like the figure below. In other words, the protein we are investigating should be normal with respect to the membrane.
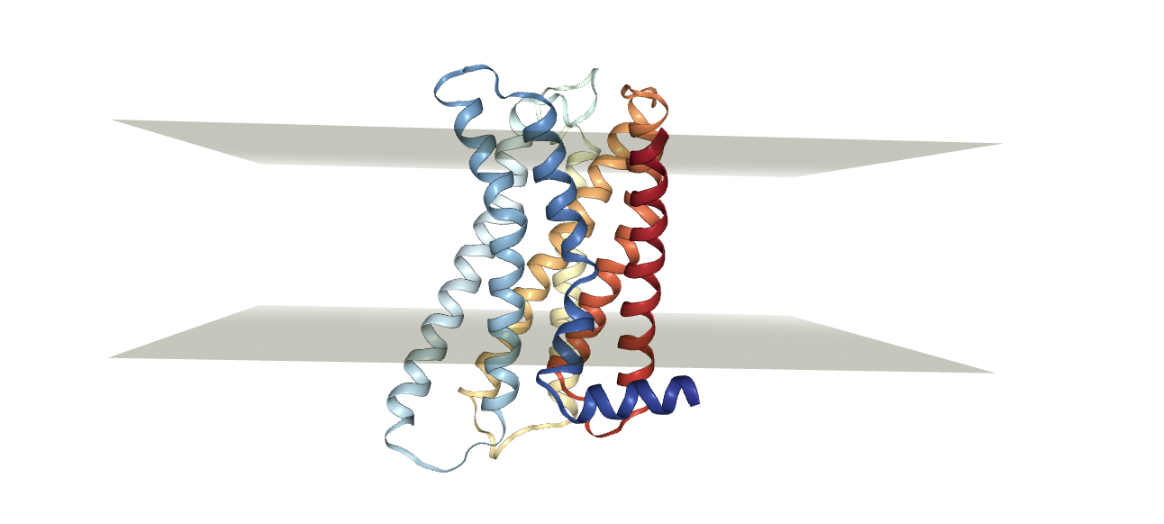
Figure: Example of a protein (GPCR) embedded in a lipid membrane. It needs to be normal to the plane of the membrane we want to add.
In our example we need to insert the PDB ID of our peptide (2MG1) in the Download PDB File option, and then select OPM as Download Source.
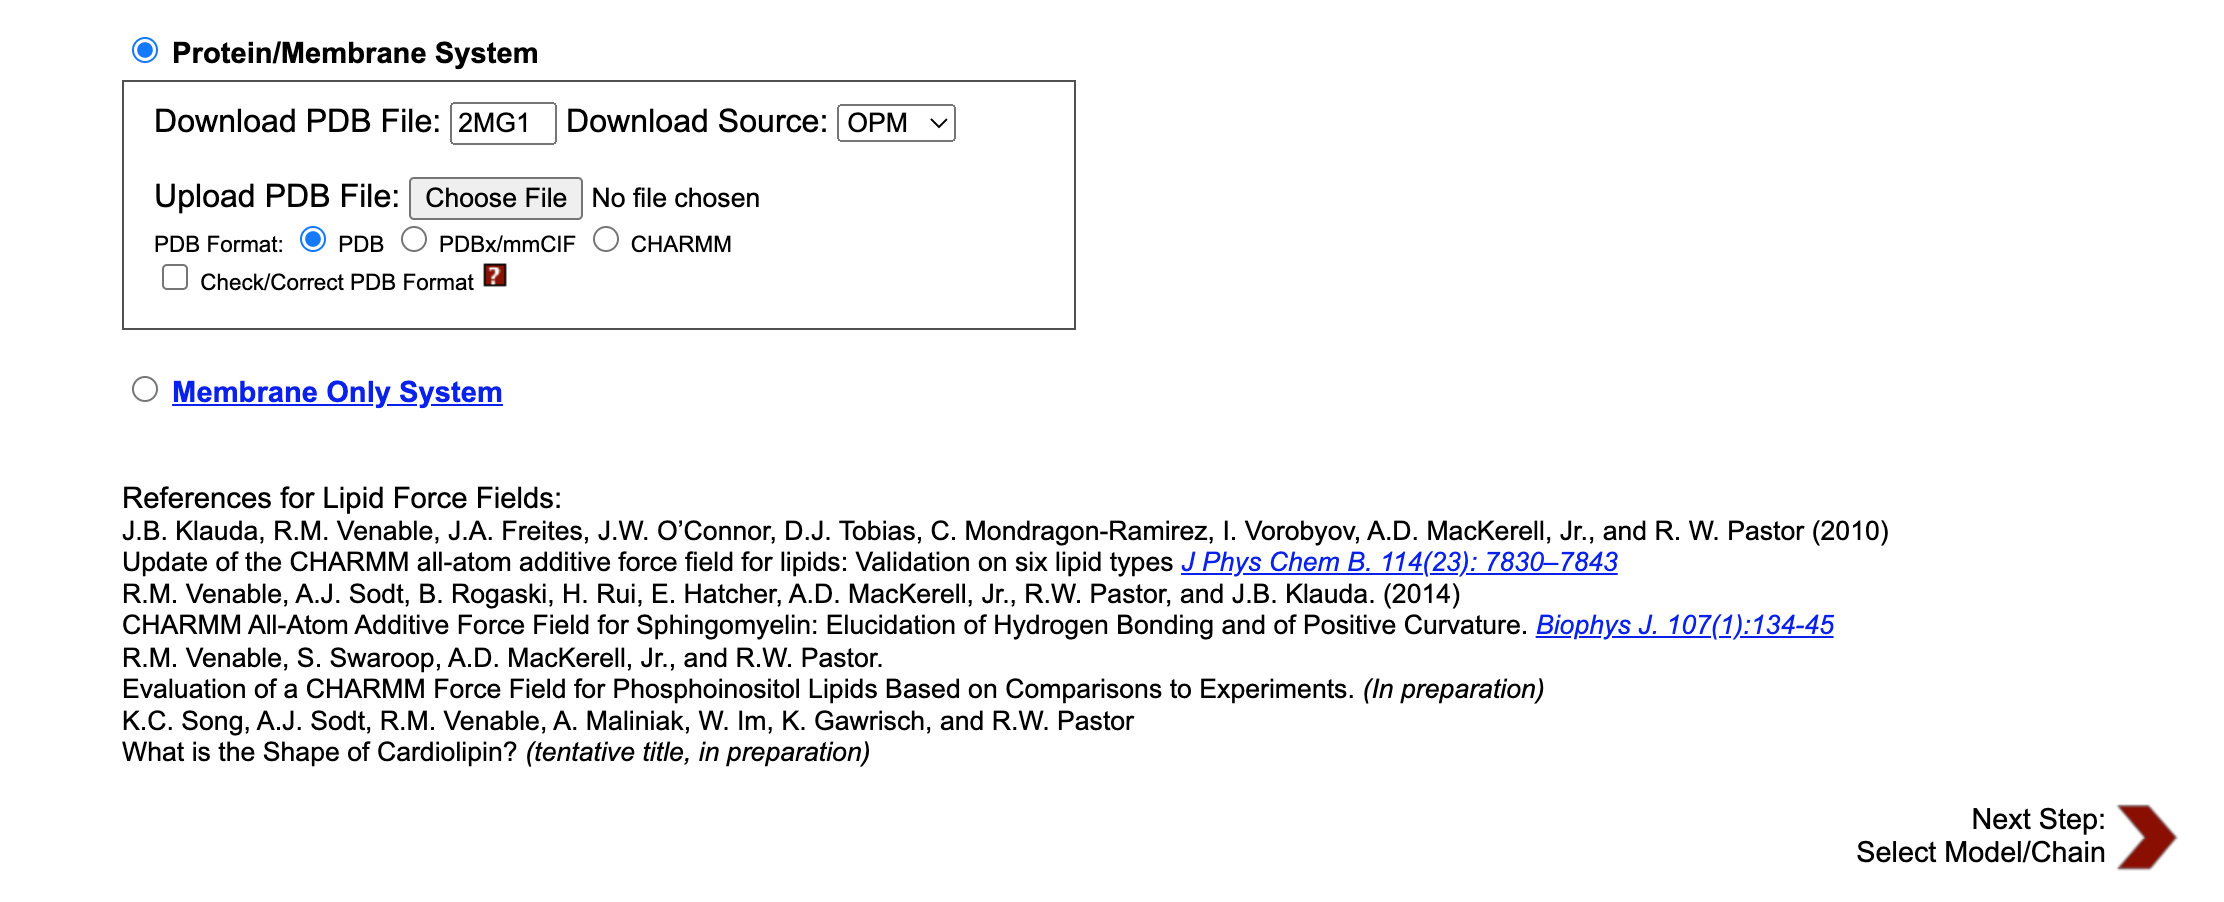
When you are done click on the Next step: Select model/Chain (bottom right).
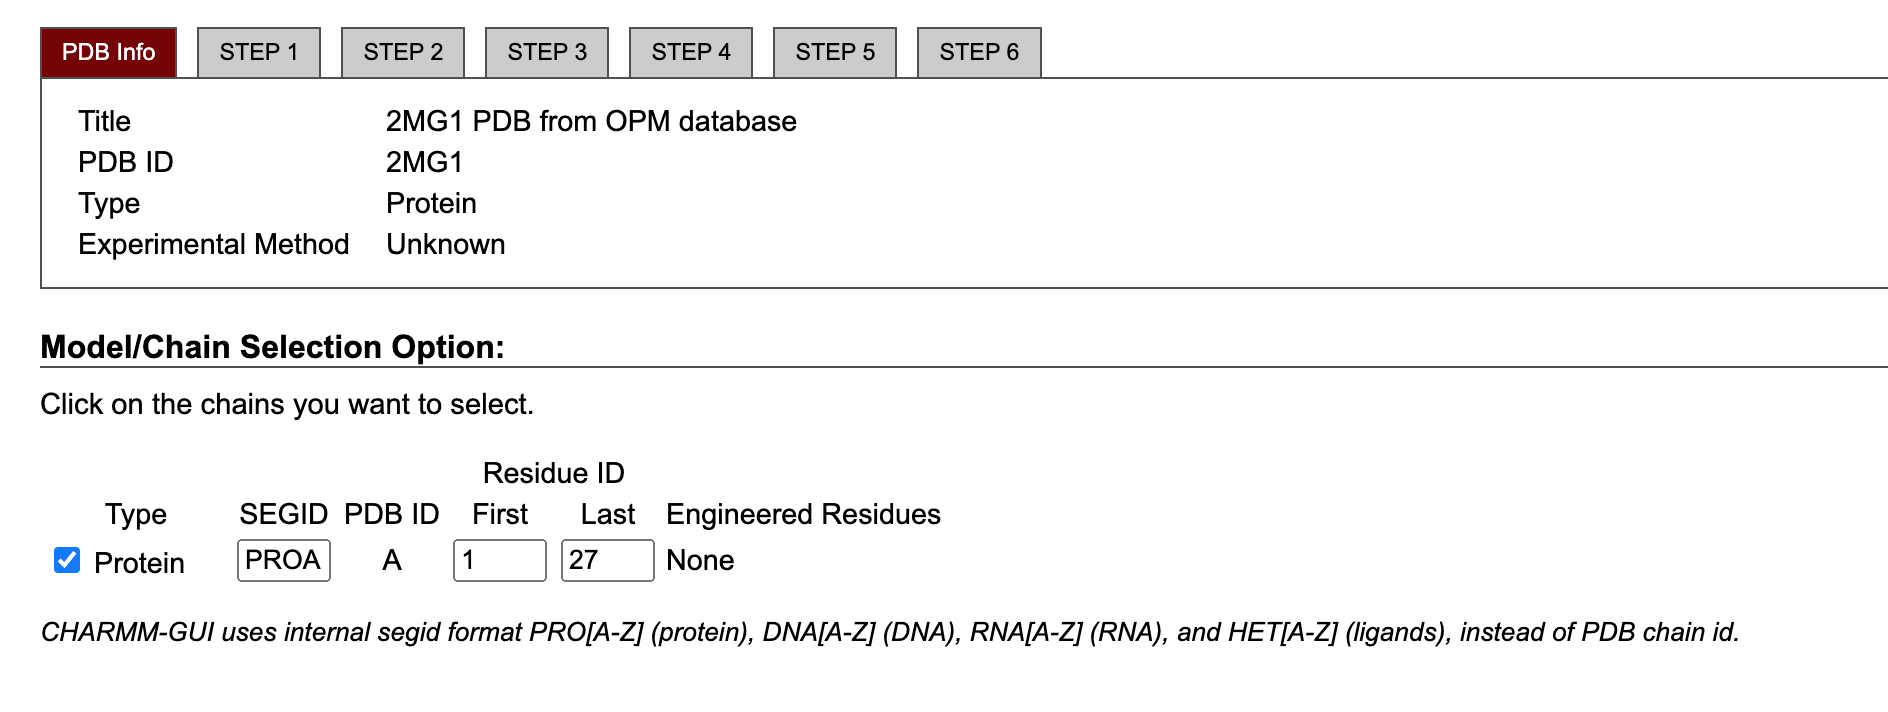
Select the chain of interest and specify the first and last residue of the protein. In our case, we just need to leave the default options.
Next step: manipulate PDB
Now we can manipulate our PDB file in different ways depending on the available information. For instance, we can insert the known disulfide bonds by selecting the residue IDs. We can look for these types of interactions in the pdb file of our protein. Also in this case, leaving the default options will do just fine for our specific example.
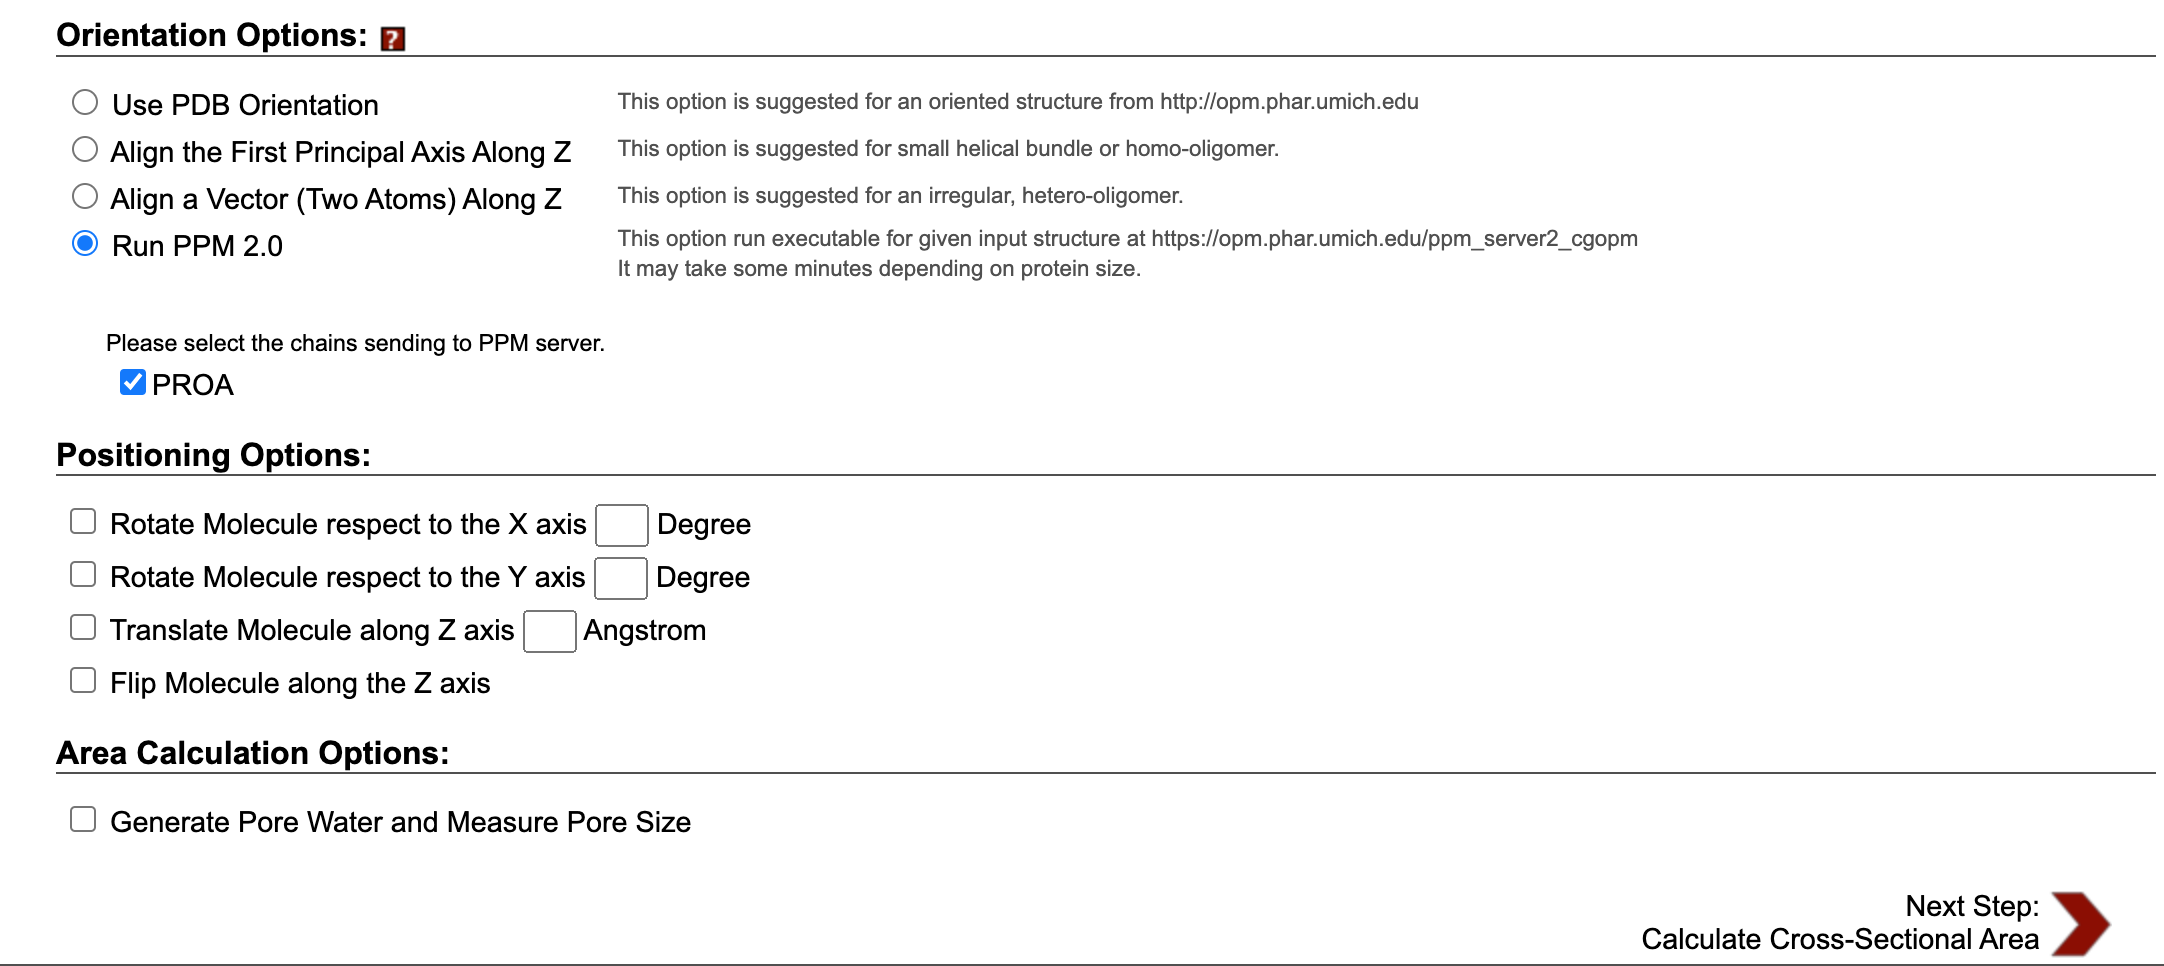
Next step: Generate PDB and Orient Molecule
At this stage, you can simply decide the axis along which we want to orient the protein. We already mentioned that we want that aligned with the $z$ axis. To do so, select Run PPM 2.0 and then proceed to the next step.
Next step: Calculate Cross-Sectional Area
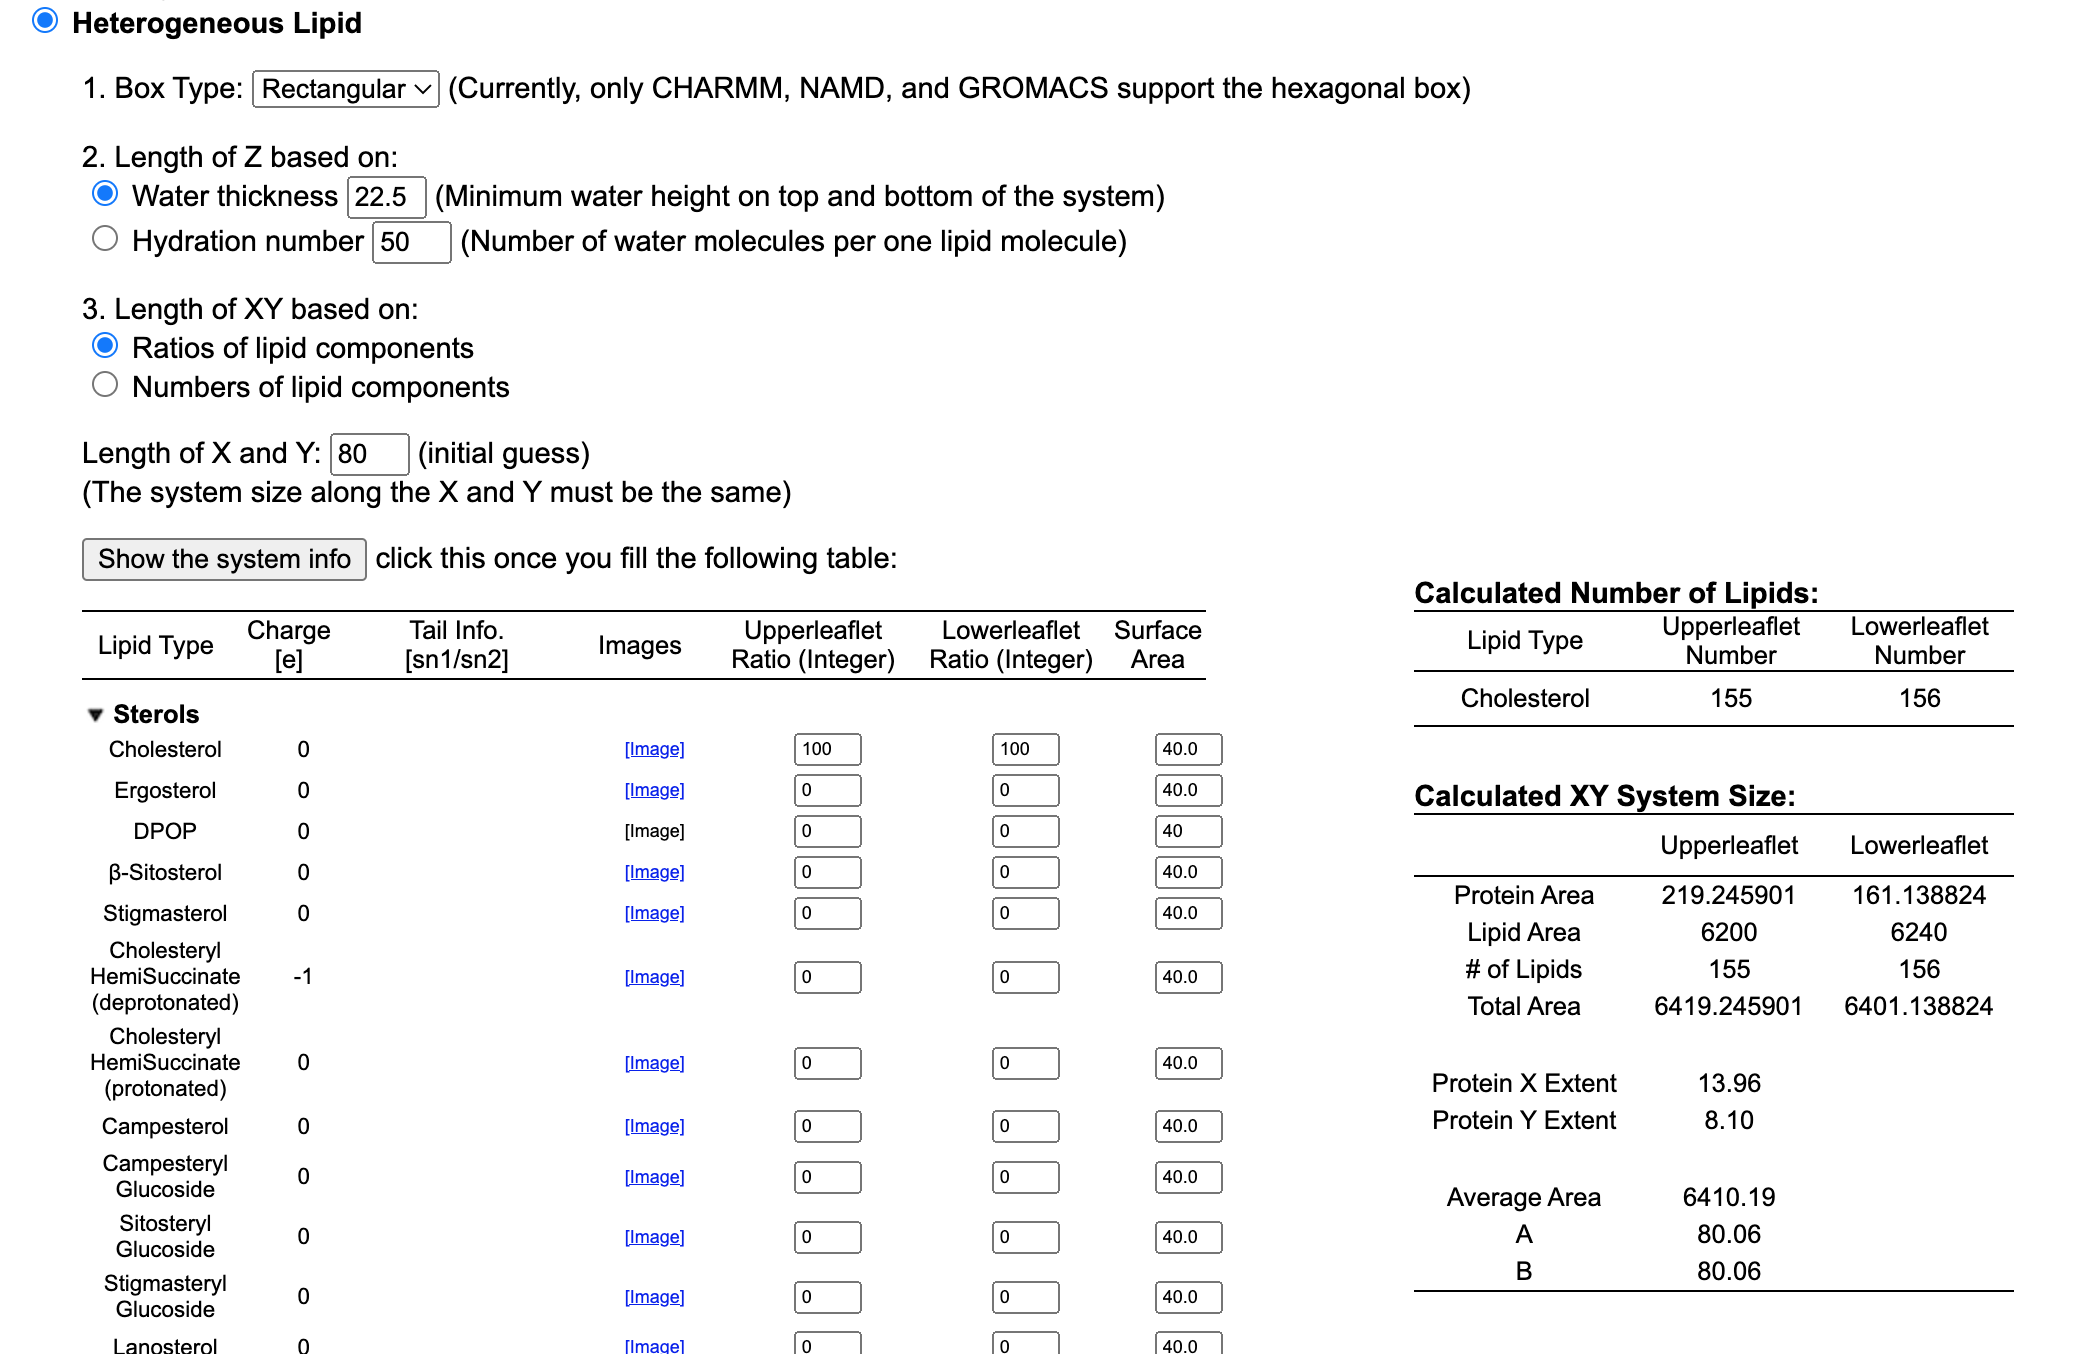
Always visualize the resulting structure to make sure that the protein will be properly aligned to the membrane we are going to add. We can analyze the structure through the built-in visualization tool (view structure), or we can download the pdb file and visualize it using our preferred visualization software (VMD, Pymol).
The desired output in this case should be resembling the figure below.
Now we have a few decisions to make.
First of all, we need to select the shape of our box. We will use a rectangular box for this tutorial. So select Rectangular in the Box type option.
As a second point, we have to select the properties of our lipidic membrane. The first possible approach that comes to mind is to use a standard membrane composed of a single lipid (e.g., DPPC), and see how the system behaves. This is of course an approximation as a real biological membrane is composed of tens of different lipids.
Ideally, you should dive into the literature and find information about the membrane composition of the system you want to simulate. However, you normally don’t have the parameters needed to simulate all of the lipids contained in a biological membrane. So we use some simplified representation of complex membranes using a few lipids with different percentages. This should be enough to provide a more accurate description.
The main point of this step is that we can adjust the percentage of each lipid we want to insert into our membrane. Feel free to play with the membrane you want to generate but remember that the more lipids you insert, the more complicated will be the simulation.
For the purpose of the demonstration, we are going to use a membrane only composed of cholesterol. So type 100 in both the Upperleaflet Ratio, and Lowerleaflet Ratio.
Once you are done the software will also ask you to select an X and Y value. In other words, we need to input the size of the box. The initial value will be a simple guess that you can adjust depending on your needs.
Also in this case we want to pose particular attention to the value we select.
-
A big box will consume way too many computational resources
-
A small box will not be able to represent a realistic system
Always try to leave a reasonable buffer between the protein and the limits of the box.
Type 80 in the Lenght of X and Y option.
When you are done click on Show the system info and proceed further.
Next step: Determine the System Size
You can have a look a the resulting structure.
Now we need to add the ions needed to neutralize the system. As basic ion types, we can select $NaCl$. Click on Cation, select alkali metals, and select $Na^+$. Leave the standard $0.15M$ concentration. Click on Calculate Solvent Composition.
Next step: Build components
The next few steps are only needed to generate the lipid bilayer, the water surrounding the membrane, and the ions we previously specified. CHARMM-GUI will then proceed to assemble all of the different components in a single file. This is a key step in every Molecular Dynamics simulation. If you are not familiar with the topic check out this article where I explain to you the different steps involved in an MD simulation.
Remember to always visualize the resulting structure after each step to make sure that everything looks correct.
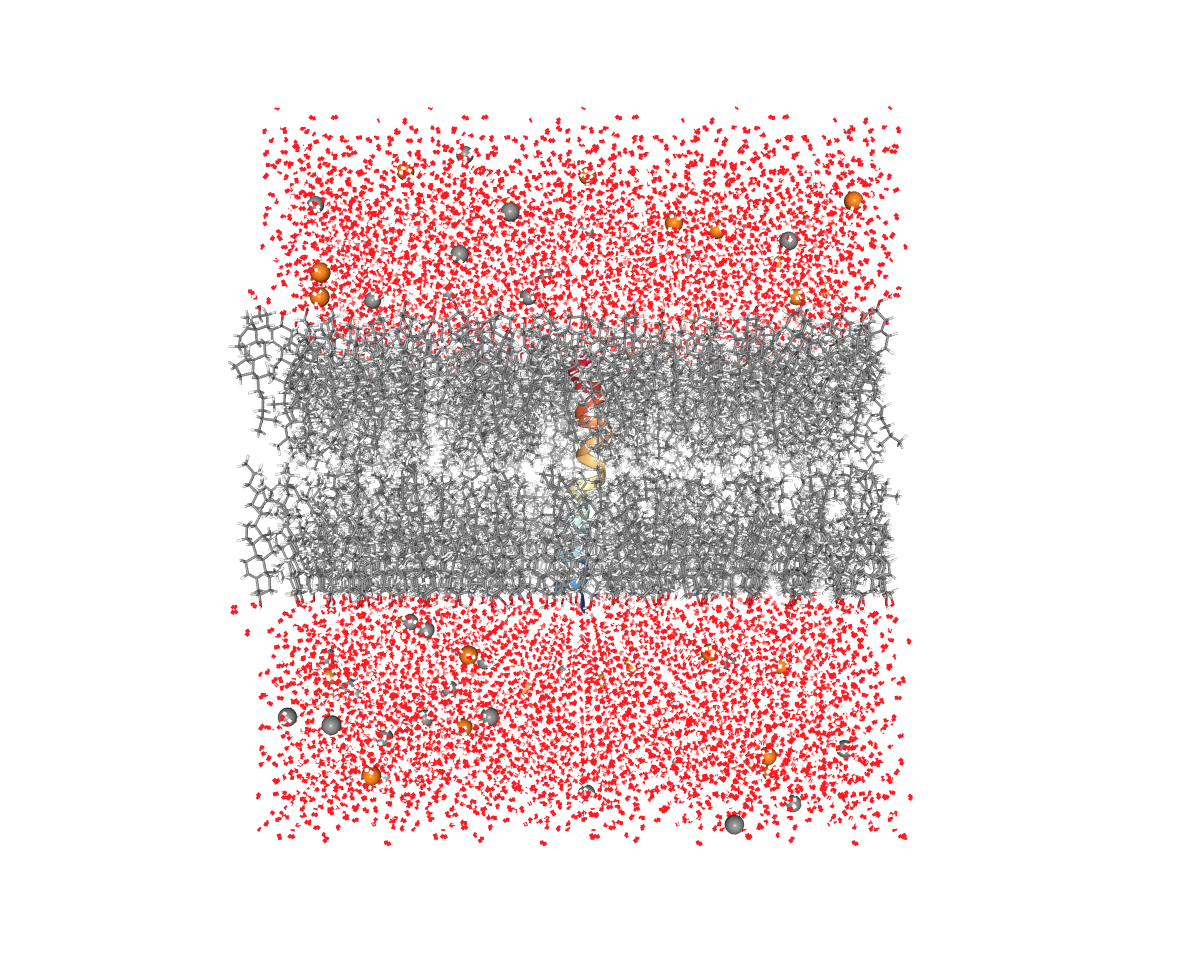
Figure: Membrane (grey), Water (red), and ions (yellow and grey balls). This is what the solvent and the membrane should look like.
Next step: Assemble components
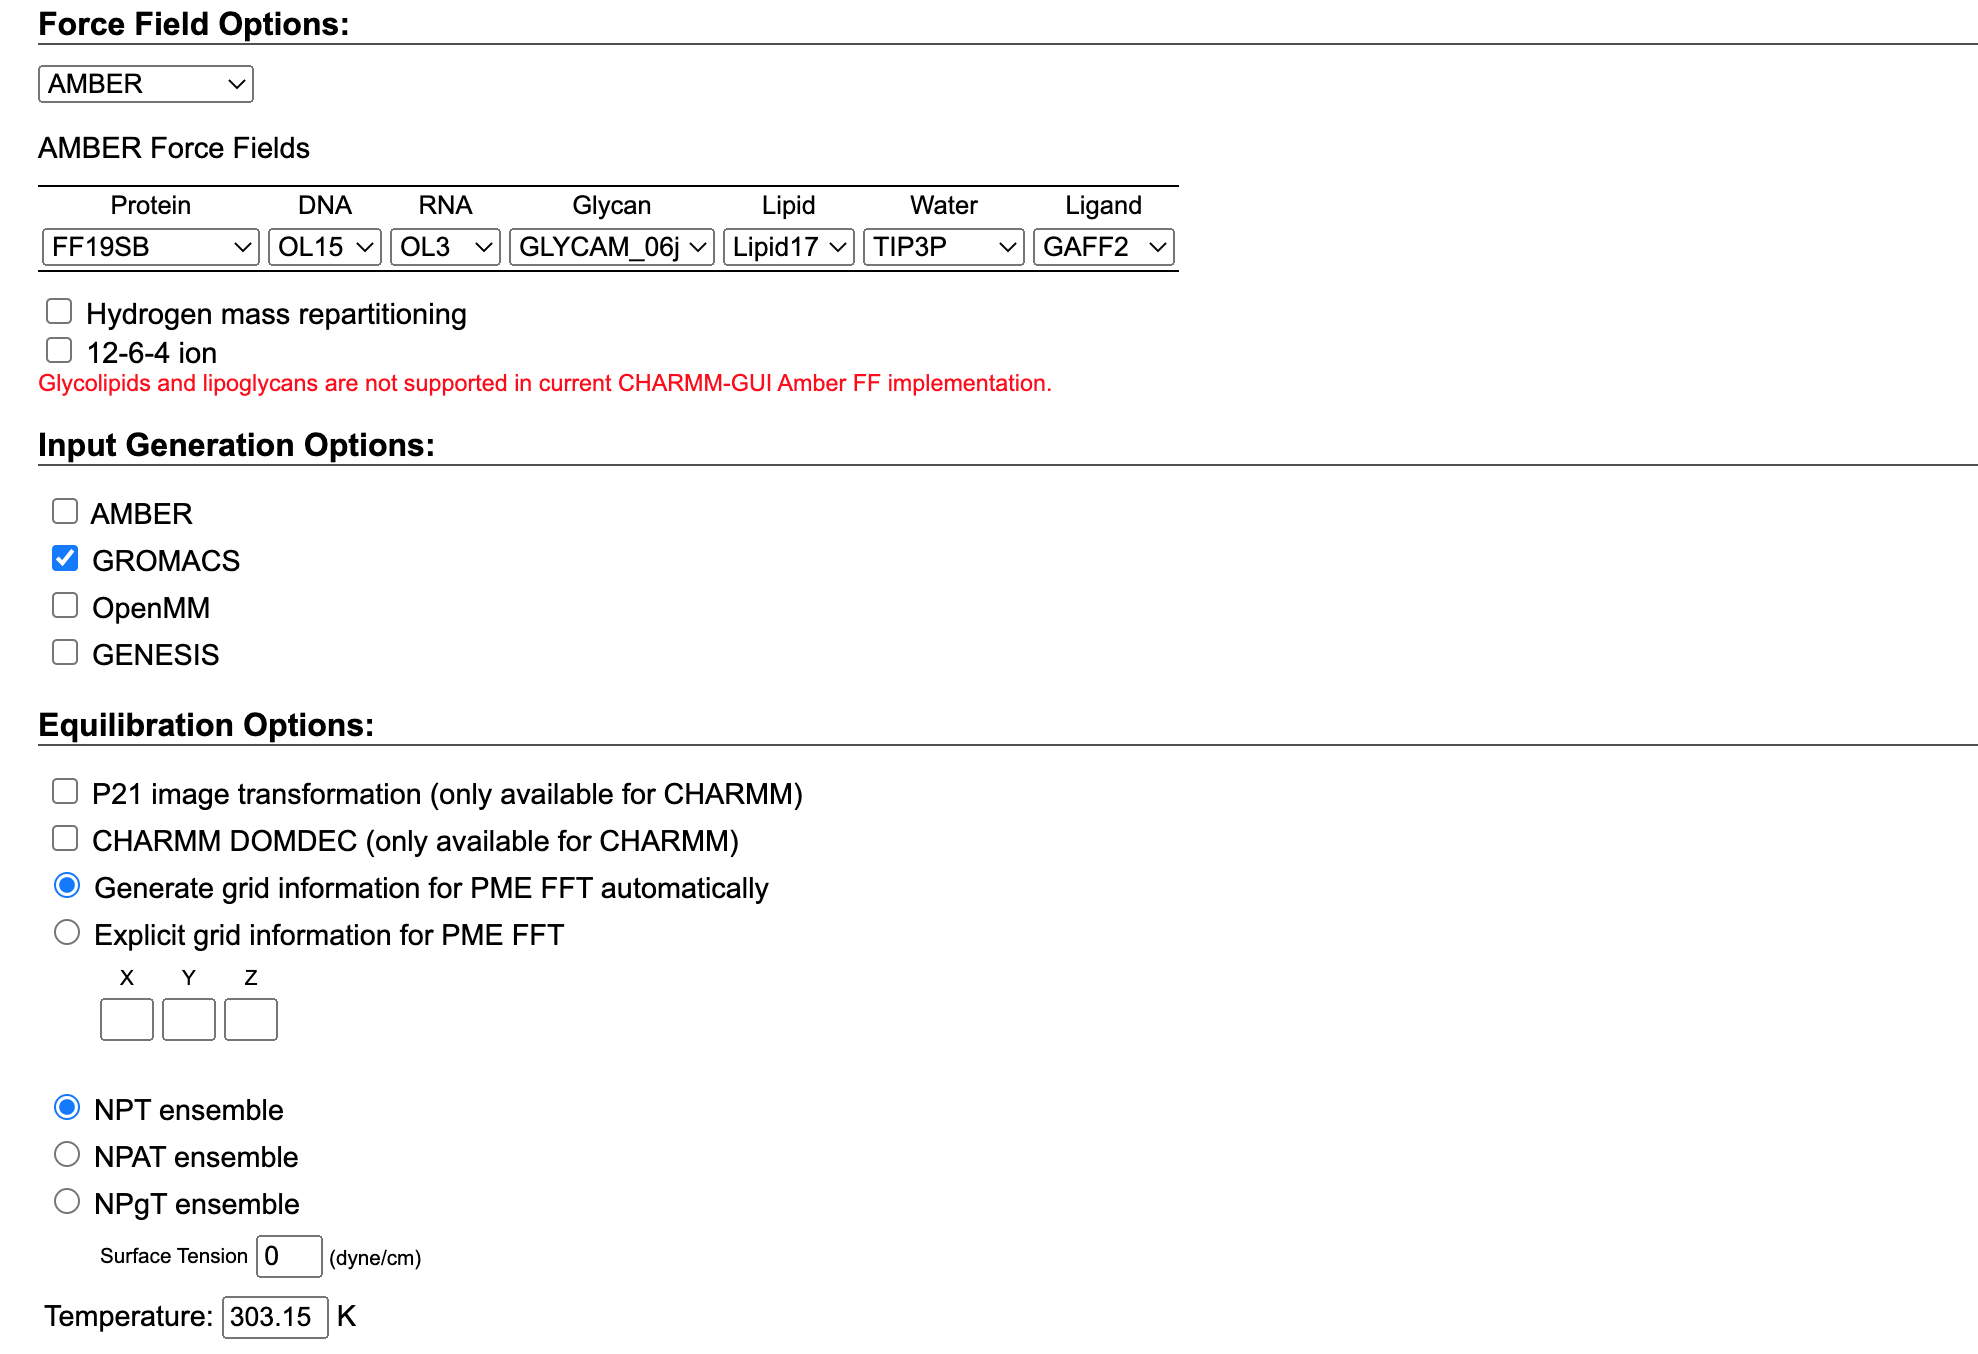
Now we need to select the Force Field we want to use. In our case, we will use the AMBER force field which is specifically designed for protein systems. Among different AMBER force fields, we can select the ff19SB as it is the most current force field, and recommended by the authors.
At the same time, we can choose the input generation options. In our case, we want to proceed with our simulation using GROMACS so we can simply select it. The platform will then provide us with the inputs needed to simulate our system in the specified software. We already showed in a different tutorial how to simulate a membrane protein in GROMACS. So if you want to follow up on that tutorial choose GROMACS but feel free to select the software you are more comfortable with.
Then click on the next step and go for a coffee, as you may need to wait a few hours to get your results.
Next step: Generate Equilibration and Dynamics Input
Finally, we have our system ready to be analyzed.
The resulting tgz file contains all the inputs file we asked for in the previous step.
Download it and unpack it.
Inside the gromacs directory you will find all the files you need to simulate the system:
- The topology of the system (
topol.top) - The structure of the system in the gro and pdb format (
step5_input.gro,step5_input.pdb). - A directory (
toppar) containing the parameters and position restraints (itp files) for the different types of species involved in the simulation. - Different mdp files with the parameters for the equilibrations and also for the production run.
- A special GROMACS index file (
index.ndx)
Finally, you can check out the next part of the tutorial where I explain to you how to simulate the protein membrane system we generated using GROMACS.
How to access previous Jobs in CHARMM-GUI
Let’s say that we want to see the status of our current job or recover some data from a previous input generation.
We can simply retrieve it through our JobID that is shown during the course of the procedure. Copy that, and go to the Job Retriever section to see all the information we need.
If we don’t remember our JobID we can simply check our Jobs in the user profile section. Click on user profile then Job IDs. Here we have all the jobs we recently started with their respective status.