How to Measure Distances and Display Interactions in PyMOL
Getting Started with PyMOL: Measuring Distances, Angles, and Visualizing Interactions
PyMOL has two ways to measure distances and angles: the Wizard tool for quick visual measurements and the distance command for precise, reproducible selections. This article covers both, with practical examples for atom-to-atom distances, ligand-binding site interactions, polar contacts, and angle measurements.
Measuring with the PyMOL Wizard Tool
Distances
Sometimes you just want a quick and dirty way to measure the distance between two atoms you identified in the structure. In such cases, you can use the PyMOL interface to select the atoms of interest and then proceed to measure the distance between them via the Wizard menu.
Drag your cursor to the upper menu bar: Wizard $\Rightarrow$ Measurement
You will be asked to pick two atoms (the selected atoms will be highlighted with pink boxes).
Once you are done a new object will be created (measure01). It will show the distance value (in Å) and a dotted line connecting the two atoms will be displayed in the interface. You can show it and hide it by simply clicking on it.

Distance between two atoms in PyMOL (2.3Å)
Angles and dihedrals
When you start a measurement process through the Wizard tool you will notice that In the bottom right a new Measurement Menu will appear. From there, you can handle the various measurements in your project.
One interesting thing you can do is to measure other bonded interactions such as angles and dihedrals by changing the Measurement Mode to Angles or Dihedrals.
To measure an angle you will need to pick three atoms. The angle value will be displayed in the interface.
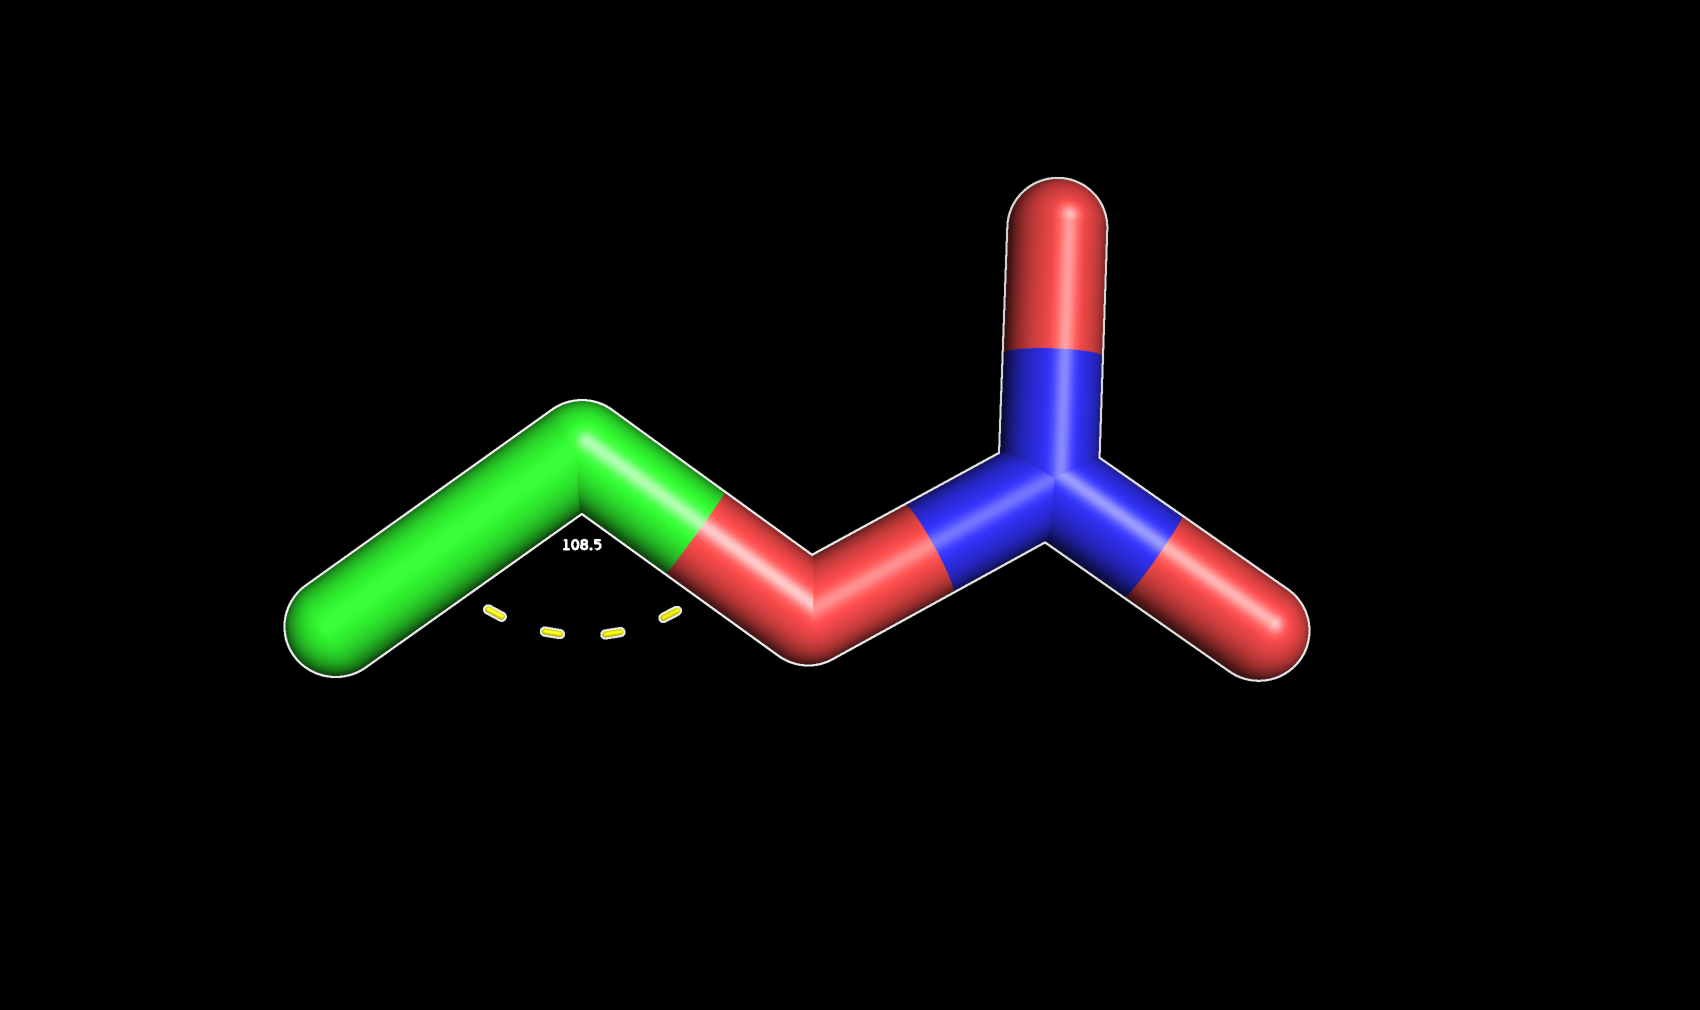
Angle between three atoms in PyMOL (108.5°)
Torsional angles are “1-4 interactions” therefore to measure them you will need to select four atoms:
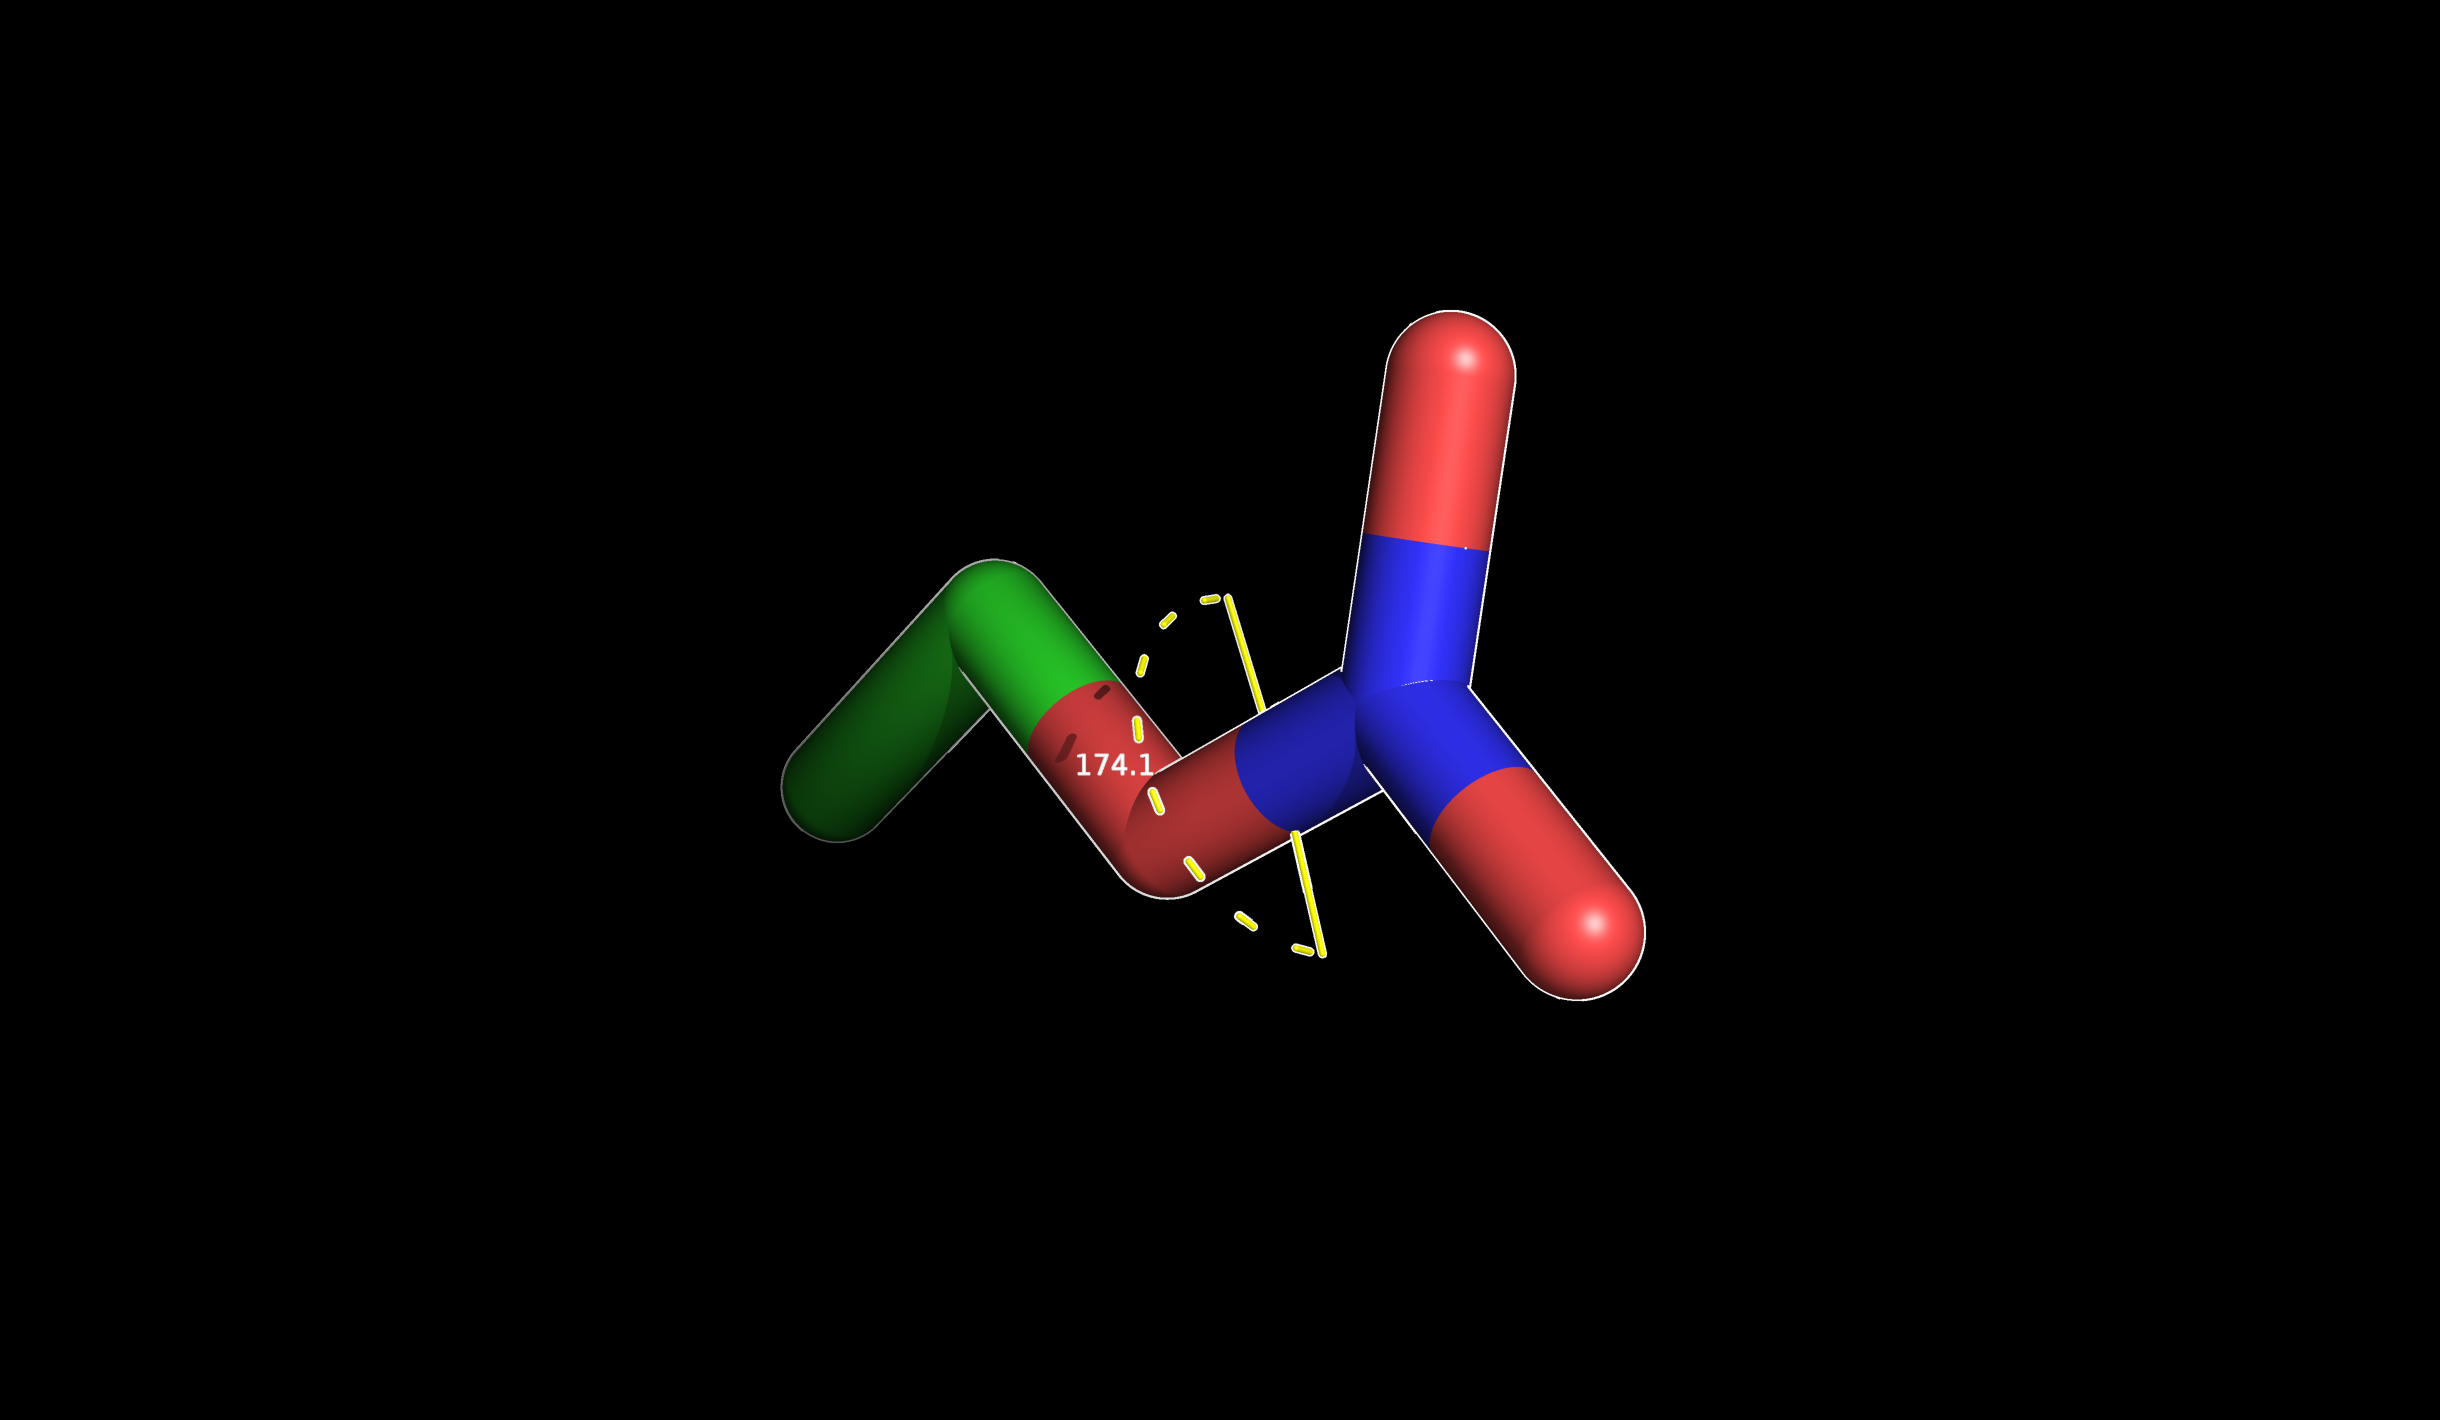
Dihedral angle displayed in PyMOL (174.1°)
Measuring from the PyMOL Command Line
The distance command
If you know of a specific interaction that might be important for your system then you can measure the distance by using the distance command.
You simply need to provide two selections, and it will output a new object showing the distances between them. Optionally, you can decide to only show the distances within a certain cutoff and to change the measurement mode.
To make this process efficient you will need to be practical with the selection algebra in PyMOL. You can find more info on PyMOL selections here.
|
|
- Select the
distancecommand - Specify the name for the newly created object that will hold the distances (
name_object). - Create the first selection (
sele_1) - The second one (
sele_2)
- Set a cutoff distance in Å (
cutoff). Only distances within this range will be added to the object. - The
distancetool has 5 modes that you can define with0,1,2,3, and4. By default, PyMOL will givemode=0where all the interatomic distances are shown. Other useful ones could bemode=2(show only polar contacts) andmode=4(show distance between centroids).
This will output a new object (name_object) displaying the distances between the two selections you specified. As you can imagine, you can get very creative with the command by playing with the selection tool. This gives you much more control over the measurement.
Now let’s explore some generic examples to give you a better understanding of how to use the distance command in PyMOL.
Distance Between Two Atoms
To measure the distance between two atoms in PyMOL you can specify their indices if you know them. For example, to measure the distance between atom 100 and atom 103 you can use:
|
|
This will create a distance_100_103 object showing a dotted line connecting the two selected atoms and the distance in Å.
If you don’t want to create a new object but just want to print the distance you can use the get_distance instead.
|
|
Distance Between an Atom and a Residue
Let’s say that you know of a key interaction between a specific atom (e.g., id 1000) and atoms in a certain residue (e.g., resi 120) in your system.
To find out all the distances between them you can use:
|
|
The representation can get quite messy. If you want a clearer vision you can choose to show only the ones within 4Å:
|
|
Distance Between a Ligand and Binding Site Residues
You can also use the distance command to show the distances between a ligand in your protein and a residue (or a set of residues in the binding site). For instance, if you have a generic ligand named LIG and you want to explore the possible interactions with a key residue (e.g., resi 118) you can use:
|
|
As always, you can specify a cutoff of your choice (e.g., 3.5Å) after the selections:
|
|
Another common analysis you may want to do is to select a group of residues (e.g., resi 118+119+120) that you know are important for the stabilization of the ligand in the binding site, and analyze which atoms are within a certain cutoff.
|
|
Displaying Polar Contacts and Hydrogen Bonds
You can show the polar interactions (including Hydrogen bonds) between a ligand and a set of residues by activating mode=2 of the distance measurement.
Let’s say you have a ligand named LIG and a group of residues (e.g., resi 118+119+120) that you know are important for the stabilization of the ligand in the binding site. You can show the polar interactions between them like this:
|
|
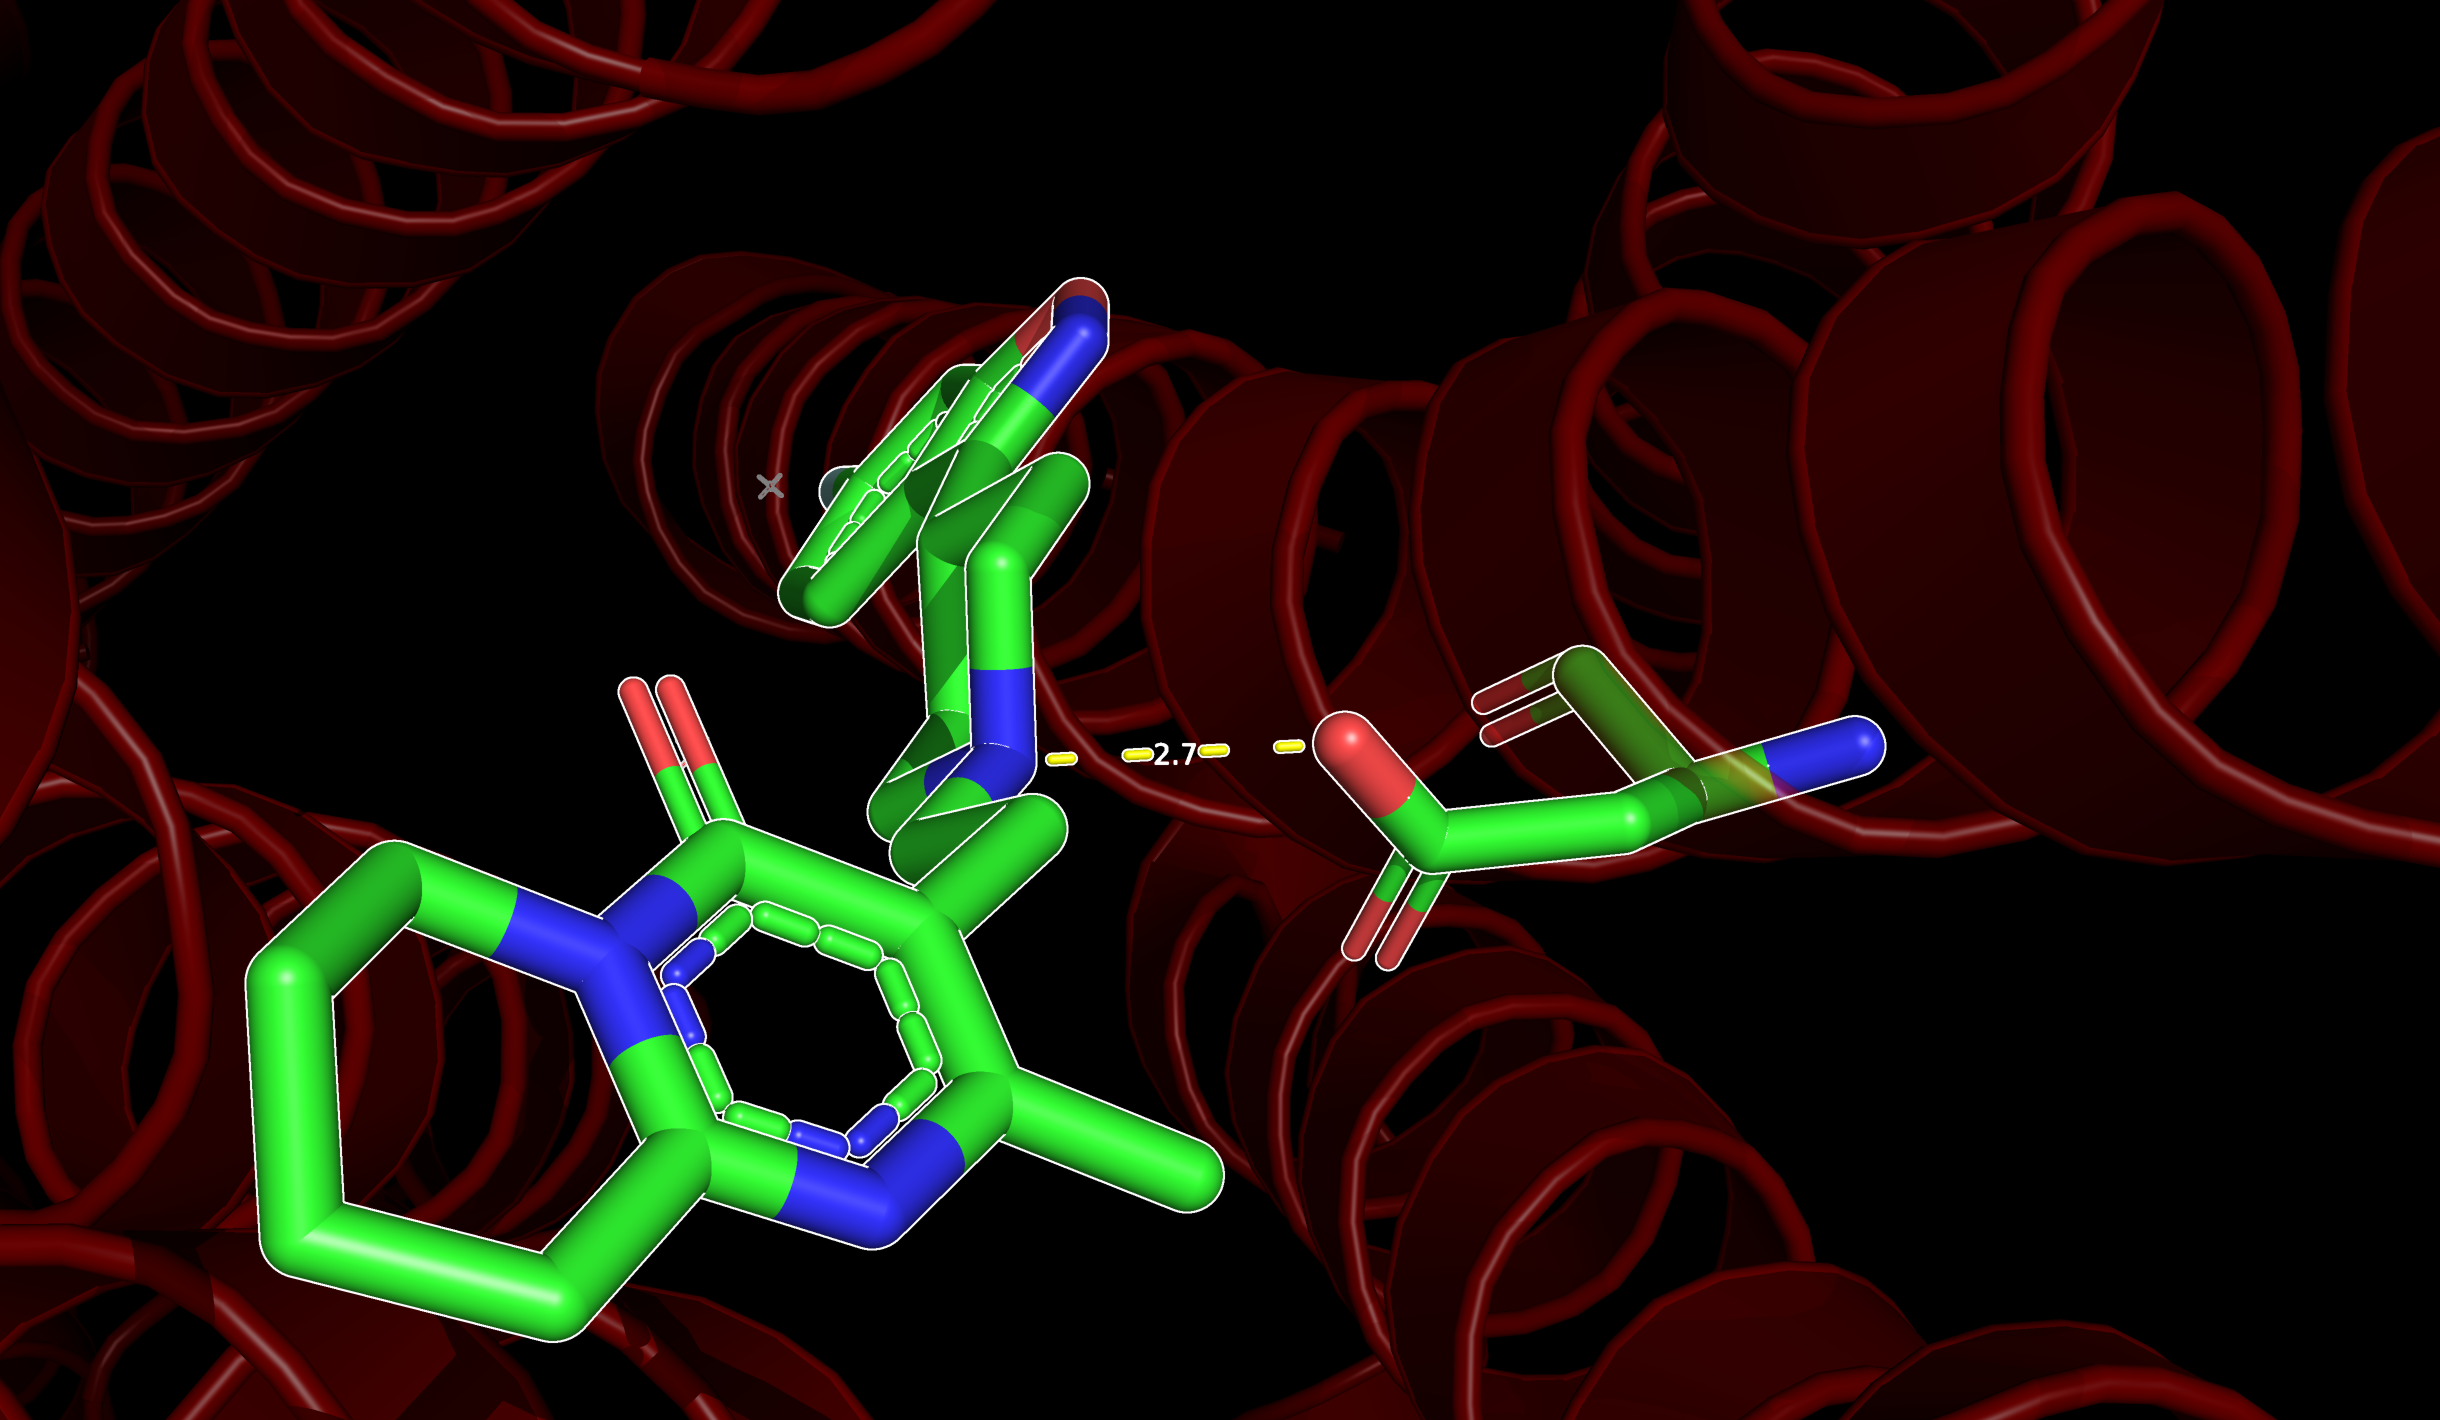
If you would like to get a similar image I suggest you read:
- This article where I showed how to customize the color and appearance of your molecules
- This article on how to make publication quality images with PyMOL
The angle command
To measure angles you can use the angle command which works similarly to the one we use to measure distances. However, here you will need three selections. Also in this case, being familiar with the selection algebra in PyMOL will be particularly helpful.
|
|
- Select the
anglecommand - Specify the name for the newly created object that will hold the angle (
name_object). - Create the first selection (
sele_1) - The second one (
sele_2) - The third one
sele_3
To measure the angle between three atoms (e.g., 100, 200, 300):
|
|
To measure the angle between the $C_{\alpha}$ in three different residues (100, 105, 110):
|
|